Lemongrass chicken

cooking

20120529-145022.jpg

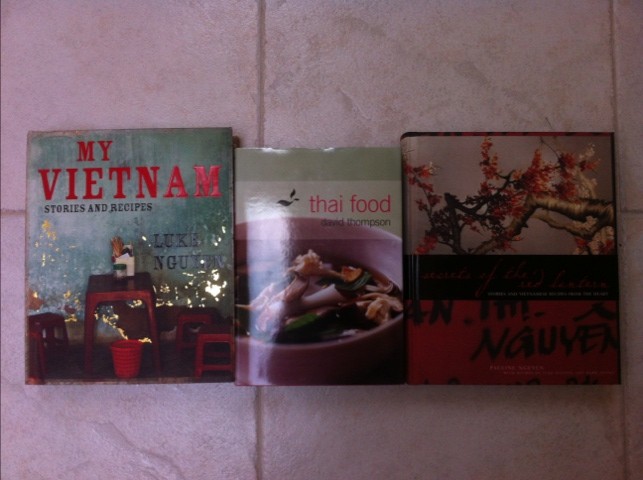
These books have been sitting on my nightstand for the past week. Really excited to get started and cook! I love the warm weather we’ve been having. Makes me want to entertain more and try out some new recipes!

The first recipe I tried from this collection is lemongrass chicken, a recipe by Australian chef, Luke Nguyen. Simple and quick if you have the ingredients on hand, Luke’s recipe calls for marinading the chicken for at least 4 hours, but how often do we really plan ahead that far in advanced for a dish that takes just minutes to cook? Since I intend to make this dish for weeknight dinners, I tried the dish without extensive marinading. I’m sure that a longer marinade time would enhance the flavor of the chicken, but I think that the bold favors of the ingredients in the sauce compensate for it. Here is my adaptation:

INGREDIENTS
2 chicken thighs cut up into sized pieces
1 1/2 tbsp fish sauce
1 tbsp sugar
2 small stalks of lemongrass (from our garden:), finely minced
2 cloves garlic, minced
1/4 tsp red pepper flakes
1/4 red onion, sliced
1/2 cup chicken broth
Few sprigs cilantro

DIRECTIONS
1. Combine the chicken, sugar, garlic and fish sauce in a small bowl. Season with black pepper. Set aside and prepare the other ingredients

2. Oil a wok and heat on medium high. Stir fry the lemongrass and chili flakes until fragrant and the cooked through. Be sure that there is enough oil to ensure that they don’t burn

3. Add the chicken and stir fry for a few minutes till chicken is cooked on the outside

4. Add chicken broth and cover the wok. Turn down heat And simmer until chicken is cooked through (1-2 minutes)

5. Remove lid and allow the sauce to reduce slightly. Add onions and cook to desired degree for cooking

6. Turn off heat and add cilantro if using

7. Turn onto a plate to serve with hot rice

Antipasta Pasta Salad

cooking

Another potluck to celebrate a holiday at work….makes working during a long weekend a lot more bearable.  If you are looking for a pasta salad that you can make ahead of time and isn’t drenched in mayo, look no further!  A trick to lessen the greasiness from the meat is to microwave it for a bit to render out some of the fat.  The key to good flavor is to salt the pasta cooking water and dress the pasta when it is still hot from cooking.

You can use any vegetables you’d like.  The original recipe included on prepared/cooked vegetables.  I like the addition of fresh veggies like the tomatoes and cucumbers to lighten up the salad for the hot weather.  Raw broccoli florets cut into small pieces and roasted veggies like eggplant or zucchini would work well too.

DRESSING INGREDIENTS:

10 TBSP red wine vinegar, divided

3 TBSP mayonnaise

6 TBSP olive oil

2 TBSP juice from jar of pepperoncinis

4 cloves finely minced garlic

1/4-1/2 tsp red pepper flakes

1/2 tsp salt

1/2 tsp pepper

SALAD INGREDIENTS:

8oz package of button/brown mushrooms, quartered

12oz jar roasted red peppers, drained and chopped into chunks

1/2 small jar marinated artichoke hearts, drained and quartered

About a dozen marinated pepperoncinis, chopped with 1 TBSP juice reserved

1 cup shredded mozarella cheese

4-6 oz sliced pepperoni, salami or other cured meat, sliced into 1/4 inch strips

1 jar olives

1 pint cherry tomatoes, halved

1 cucumber chopped into chunks the size of the halved tomatoes

1 large handful basil, chiffonade

1 ld bite sized pasta (penne, bowties, fusilli)

Boil 4 quarts of water, 1 TBSP salt and pasta until al dente according to the package instructions.

Meanwhile, prepare the dressing.

Whisk 5 TBSP red wine vinegar and the rest of the dressing ingredients in a small bowl.  Set aside 1/2 cup of dressing, adding the remaining 5 TBSP red wine vinegar to the reserved dressing.  This will be used to dress the hot pasta.  The rest will be used to cook the mushrooms.

Drain the cooked pasta well and return to the pot.  Add the 1/2 cup of reserved dressing with added red wine vinegar to the hot pasta and mix well.  Adjust seasoning to taste.  Lay pasta out on foil-lined baking sheet and allow to cool for about 30 minutes.

Meanwhile, in a saute pan, add the remaining dressing and simmer on med-high heat.  Add mushrooms and cook until tender (around 5-8 minutes).  Remove mushrooms with a slotted spoon and allow to cool.

Place cured meat on a paper towel-lined plate as a single layers, topping each layer with paper towels.  Microwave for about 60 seconds.  Blot grease and set aside until you are read to assemble the salad

Once the pasta has cooled to slightly warmer than room temperature, use a big bowl to assemble the salad.  Combine the dressed pasta, cured meats, vegetables and cheese.  Add the basil last to prevent over handling and bruising.  Season to preference.

Serve at room temperature.  Can be prepared a few days ahead of time and stored in the refrigerator.

Two Years of Wedding Bliss

celebrations, dining, friends

Another year has quickly gone by. It was a year full of travels near and far from home – Northern California, Argentina, Joshua Tree, LA, Death Valley, Vietnam, Utah. I’m very lucky that I’ve got such a wonderful husband who I admire for his confidence, honesty and strength.

We returned to the place where we got married to celebrate our anniversary – at a cozy little table set for two at The Prado in San Diego’s Balboa Park. Dinner consisted of a stone fruit farmer’s salad, seared US Kobe beef sushi rolls, roasted duck breast with blackberry sauce for me, and the most delicious Ribeye steak with peppercorn sauce for him. We enjoyed a flan cheesecake for dessert. The night was so simple yet so enjoyable. We talked and dined at the restaurant for almost 3 hours over a bottle of pinot. And since it was a Wednesday night, we almost had the restaurant to ourselves!

Life can get very hectic with work, family and household responsibilities, even for this DINKY family. I was so so happy on our anniversary night that we could spend it with each other without a care in the world 🙂

As for a gift, B added another orchid to my collection as well as some cookbooks I have been eyeing ever since we got home from our southeast Asia trip:

I’m excited to acquire some more Asian cookbooks to my collection, especially the Vietnamese cookbooks!  Thank you sweetie!

Banana Muffins (and Vanilla Pudding Frosting!)

cooking

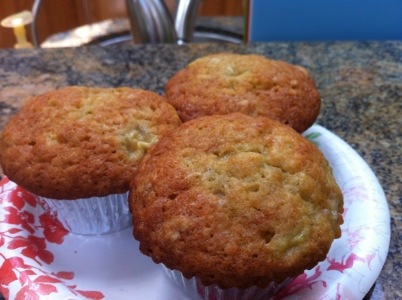
One great thing about having bananas always on our grocery list, is having brown speckled bananas around every now and then! I’d been working the entire Memorial Day weekend which wasn’t so bad since I was still able to visit with my in-laws who were in town, but I woke up quite early this morning just out of habit since I start work at 7AM. I had enough time to try a new recipe for banana muffins I found online on BrownEyedBaker’s website. I didn’t have a chance to snap a picture since they were quickly whisked away to be shared at B’s work. I made a few changes to suit my taste. I use raw almonds to top my muffins since they will toast while the muffins are baking.

These muffins have enough sugar to develop a nice crisp and sweet top-no frosting necessary! They are also ready so much faster than banana bread, which I still prefer for it’s dense texture and more complex flavor. But in a pinch, these are great!

Dry Ingredients:
3 cups all-purpose flour
1 teaspoon baking soda
1 teaspoon salt
1/2 teaspoon baking powder

Wet Ingredients:

3 large eggs

2 cups sugar

1 tablespoon vanilla extract

1/2 cup vegetable oil

1/2 cup melted butter, slightly cooled

4 ripe bananas, peeled and coarsely mashed (*ripened bananas can be peeled then frozen in plastic bags for later use. Just thaw in the microwave!)

Topping (optional): Raw sliced almonds

Directions: Preheat the oven to 325 degrees F.

Microwave butter until just melted, set aside to cool and to use when preparing wet ingredients.

Whisk the dry ingredients together in a bowl. In a separate bowl, beat the sugar and eggs together for about 30 seconds until the sugar dissolves and mixture is light. Beat in oil, butter and vanilla into the egg mixture, then stir in the banana. Add the dry ingredients and fold with a spatula just until blended.

Divide the batter among the prepared muffin cups. Top each muffin with almonds. Bake the muffins on the middle rack until the tops are golden brown and a tester inserted into the center comes out with no crumbs attached, about 25 minutes.

20120701-112654.jpg]]

UPDATE:
I made these muffins sans nuts and added a vanilla pudding frosting to make them more like cupcake treats. I made them together with my Strawberry Dream Cpcakes and Chocolate Cupcakes with Chaocolate Ganache. I call them Banana Cream Cupcakes:)

Vanilla Pudding Frosting:
1 package vanilla pudding ( 3.4 oz box)
1 cup cold milk
A few large spoonfuls of Cool Whip

Whisk Instant Pudding and cold milk for 2 minutes. Refrigerate to allow to set.
Fold in desired amount of Cool Whip
To decorate cupcakes: I cut a little well in the center of each cake then filled it and the center of the top of the cupcake with the frosting using a pastry tip.